First Steps with AvaloniaUI - Customising a To-Do List Project
This blog post documents a process of taking the app built in the Simple ToDo-List tutorial and slightly modifying it.
The codebase is here, the pull request with all changes described in this post is here
Get Ready
The project codebase lives in a GitHub repository, which requires a name. The tutorial project is named SimpleToDoList; however, this name cannot be used as is. This is because "simple to-do list" is a common project to try when learning a new technology. A better name is avalonia-to-do-list. It specifically relates this project to trying out the Avalonia framework. This also allows for future project names to follow the same naming pattern: {technology name}-to-do-list.
At this stage, the repository is ready, and the first commit sets up an empty solution. All subsequent commits are part of the pull request here.
The tutorial code lives in a subdirectory of a GitHub repository, rather than the repository itself. At the time of writing this, GitHub does not have a built-in tool to download just a directory; instead, a tool like this can be used.
Due to using a different name, both the folder and the .csproj file need to be renamed. Finally, this commit adds the project to the solution.
The result is a running app identical to the one at the end of the tutorial:

Adapt
At this stage, the codebase is cleaned up to get ready to get extended.
The first commit renames all mentions of SimpleToDoList in the namespaces and other parts of the code to AvaloniaToDoList. In Rider IDE on Mac, the namespace can be renamed using the shortcut Option + Command + R. Similar functionality is likely available in other IDEs and operating systems.
The second commit removes the README file and the _docs folder, which contained images used in the README. The README file described the process of building the tutorial app. It is not relevant to this case, as the complete add is taken as the starting point.
The third commit updates the target framework from .NET 6 to .NET 8 and upgrades all packages. Updating the target framework is as easy as opening the .csproj file and changing the digit 6 to 8. For updating the packages, Rider IDE provides a convenient "Upgrade Packages in Solution" button.
Extend
The idea is that once an item is completed, it cannot be uncompleted. Therefore, it would be useful to separate new and completed items, and show the full history of completed items, including their completion date and time.
The following subsections walk through the implementation of this idea step by step.
Separate New & Completed Items with Tabs
The TabControl is one way to separate new and completed items. An alternative approach could be to show all items in a single list, with new items at the top and completed at the bottom.
This commit implements the tab-based layout.
Two challenges surfaced during the implementation:
The first is the large text size of the tab control headings, with no obvious option to make it smaller. This causes the tabs to be displayed vertically rather than side by side. A possible solution is to increase the screen width from 300 to 380 units.
The second challenge involves indentation conventions in the XAML files. Each XAML element has a start and an end tags. When nesting one control within another, the block of code has to be selected, indented, and then the parent control's start and end tags added. This process is awkward, but likely to become easier with practice.
At this point, the app looks like this:

Modify New Items Look
The CheckBox control is no longer appropriate for marking items as completed, because completed items are not meant to be uncompleted. A better option is to use a button. Once triggered, the item moves to the completed items section.
This commit implements the updated view. The CompleteItem button follows the same code structure as the DeleteItembutton and uses the same icon as the AddItem button.
Here are the results:

Update the Model
This commit updates the ToDoItem model by adding CompletionDateTime and Status properties, and removing the IsChecked property. The IsChecked boolean property is no longer suitable for representing the completion status, as the view no longer uses a check box. It has been replaced by the Status enum property. The commit also updates parts of the view models that rely on these properties.
public class ToDoItem
{
    public string? Content { get; set; }
    public DateTime? CompletionDateTime { get; set; }
    public ToDoItemStatus Status { get; set; }
}

public enum ToDoItemStatus
{
    New,
    Completed,
}
Implement Completed Items
This commit implements the completed items feature. The implementation can be divided into three parts.
The first part is the view. The implementation is straightforward TextBlocks within Grid within ItemsControl within ScrollViewer within TabItem. Each one of these controls has already been used elsewhere in the project.
<TabItem Header="Completed Items">
	<ScrollViewer>
		<ItemsControl ItemsSource="{Binding CompletedToDoItems}">
			<ItemsControl.ItemTemplate>
				<DataTemplate DataType="vm:ToDoItemViewModel">
					<Grid ColumnDefinitions="Auto, *">
						<TextBlock Grid.Column="0" Text="{Binding CompletionDateTime}"/>
						<TextBlock Grid.Column="1" HorizontalAlignment="Center" Text="{Binding Content}"/>
					</Grid>
				</DataTemplate>
			</ItemsControl.ItemTemplate>
		</ItemsControl>
	</ScrollViewer>
</TabItem>
The second part is the view model. New and completed items are represented by two separate observable collections. The movement of items between these collections is managed by the CompleteItem command and the InitMainViewModelAsync method. There may be alternative, better approaches available.
public ObservableCollection<ToDoItemViewModel> NewToDoItems { get; } = [];
public ObservableCollection<ToDoItemViewModel> CompletedToDoItems { get; } = [];
The third part is data persistence. When items are loaded from the file, the InitMainViewModelAsync method sorts out which of the two observable collections each item goes to. When items are saved to the file, the DesktopOnShutdownRequested method concatenates the two collections to persist items from both of them.
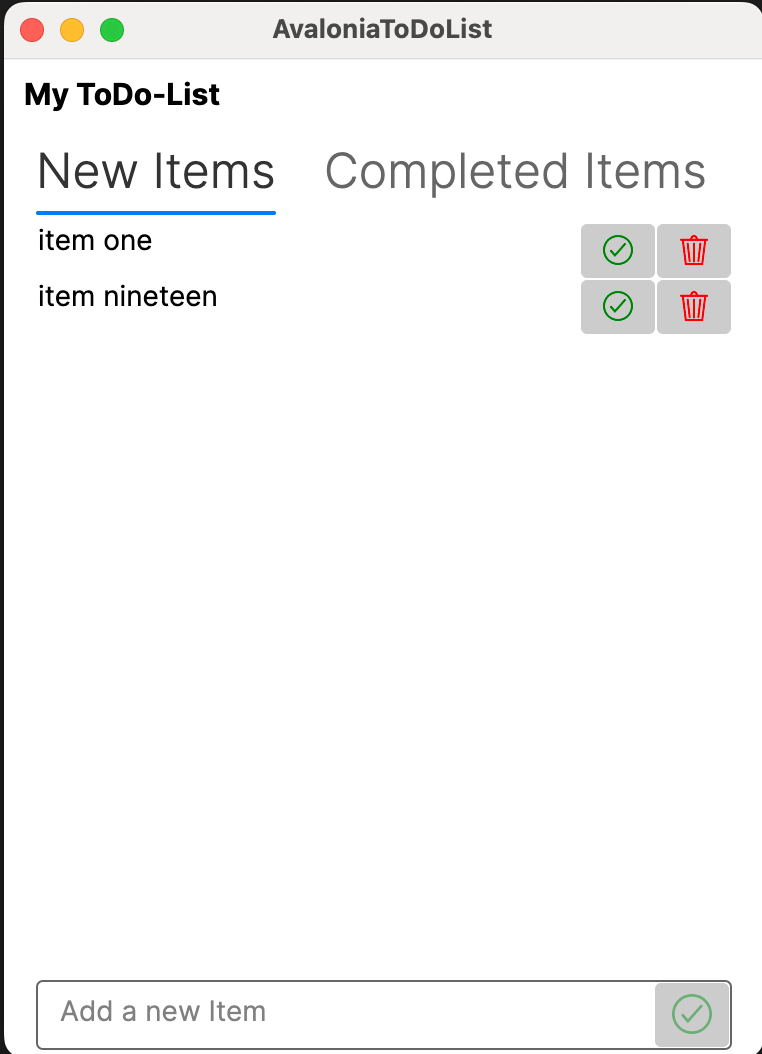
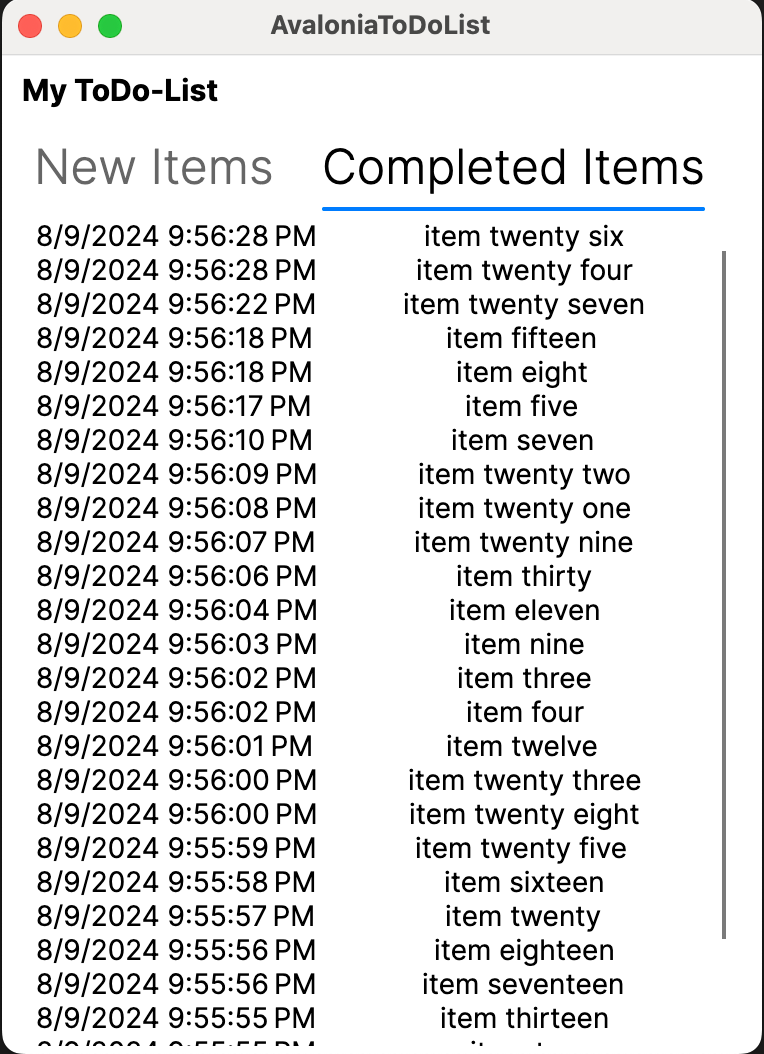
Here are the results of the complete app:
Conclusion
This post has introduced AvaloniaUI and showcased an extension to a tutorial project.
